Notes:
* the software used in this tutorial is
Adobe Photoshop CS5 Extended
* the size of the final result image is 1024 * 768
* you might want to check the
Basix Page to see some useful topics on dealing with Photoshop basics, such as loading palettes and some shortcuts.
Happy New Year!
To all
textuts‘ readers, followers, subscribers, and fans. Thank you for making 2011 an amazing year with all your support.
Hope 2012 will be an awesome year for each and everyone of you.
Don’t forget to send me any notes, suggestions or ideas through the
contact form.
Best regards,
Rose
.
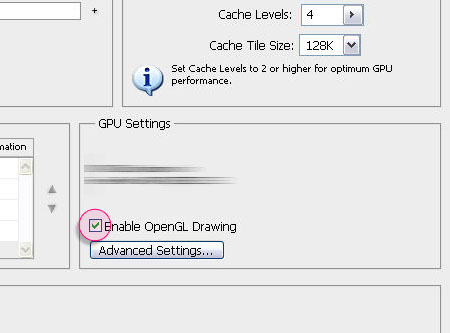
Enabling OpenGL
The Repoussé will not work unless OpenGL is enabled. So go to
Edit -> Preferences -> Performance, and make sure
Enable OpenGL Drawing (under GPU Settings) is checked.
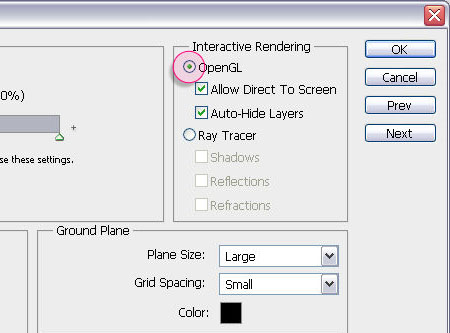
Also, go to
Edit -> Preferences -> 3D, and make sure
OpenGL (under Interactive Rendering) is enabled.
 Step 1:
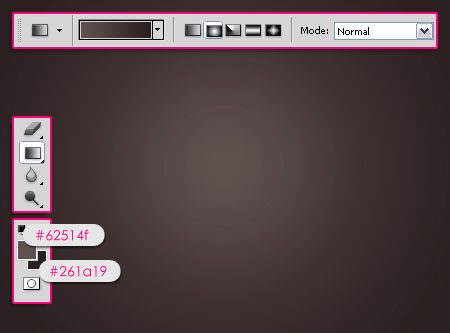
- Set the Foreground color to
#62514f, and the Background color to
#261a19, then, create a
Radial Gradient from the center of the document to one of the corners.
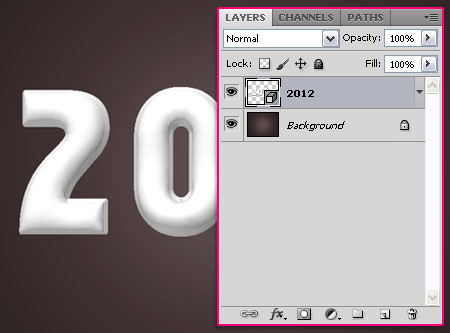
- Create the text in white color. The font used in
Familian, and the size is 370 pt.

- Go to
3D -> Repoussé -> Text Layer.
A dialog box will appear telling you that this will rasterize
the type layer, and you will no longer be able to modify your text. So
if you are sure you don’t need to modify your text, click yes and
continue.
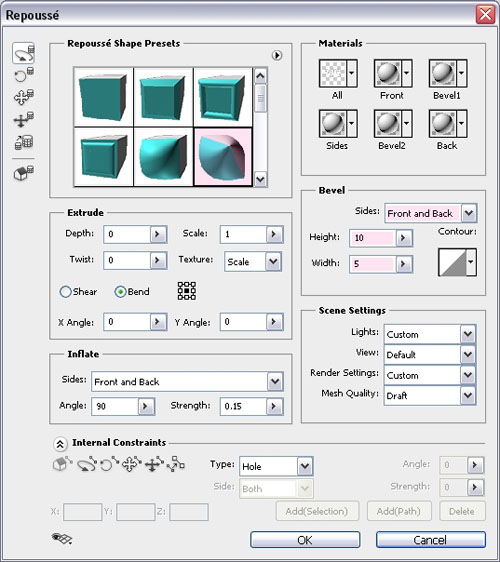
- Under the
Repoussé Shape Presets, choose
Inflate Sides. Then, under
Bevel, choose
Front and Back from the
Sides drop down menu, set the
Height to
10 and the
Width to
5.
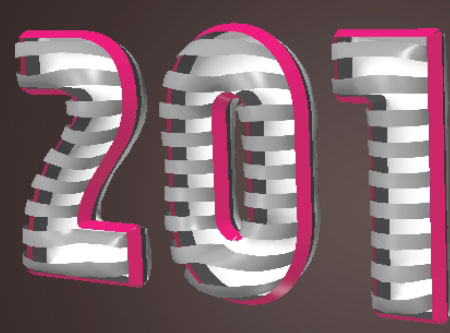
- This is what the text should look like.

- Notice also how the text layer’s thumbnail (icon) changes as the text is a 3D object right now.
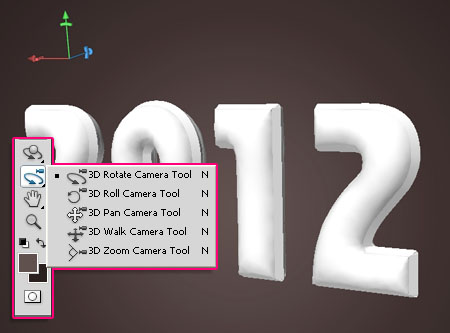
- In the Toolbox, select the
3D Rotate Camera Tool, and rotate the view of the 3D scene. You can use the other
3D Camera Tools as well until you like the angle of the camera. (Remember, we are changing the camera angle, NOT the object’s position.)
You can find some tips on how to use the 3D Camera Tools here.
 Step 2:
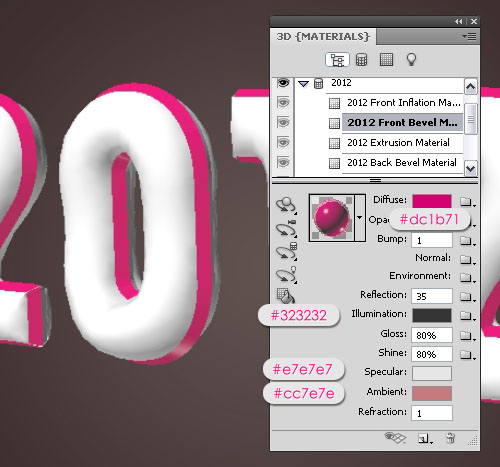
Next, we are going to modify the materials for the different sides of the 3D text. So open the
3D
Panel (Window -> 3D), and expand the 3D object (click the arrow to
its right) to view its different materials. Click each material name to
modify its settings as shown below:
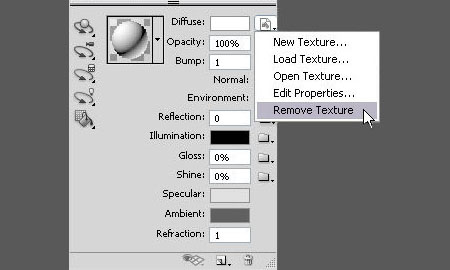
Note: You might need to Remove the Diffuse Texture for each one of the materials before assigning the new values.
-
Front Bevel Material: Change the
Diffuse color to
#dc1b71, the
Reflection to
35, the
Illumination color to
#323232, the
Gloss to
80%, the
Shine to
80%, the
Specular color to
#e7e7e7, and the
Ambient color to
#cc7e7e.
-
Back Bevel Material: Change the
Diffuse color to
#3e3e3e, the
Reflection to
35, the
Illumination color to
#323232, the
Gloss to
80%, the
Shine to
80%, the
Specular color to
#e7e7e7, and the
Ambient color to
#000000.

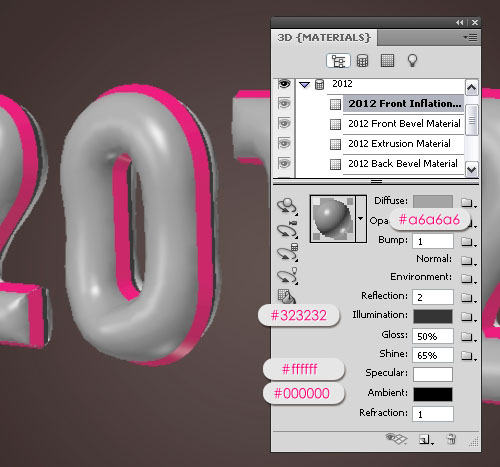
-
Front Inflation Material: Change the
Diffuse color to
#a6a6a6, the
Reflection to
2, the
Illumination color to
#323232, the
Gloss to
50%, the
Shine to
65%, the
Specular color to
#ffffff, and the
Ambient color to
#000000.
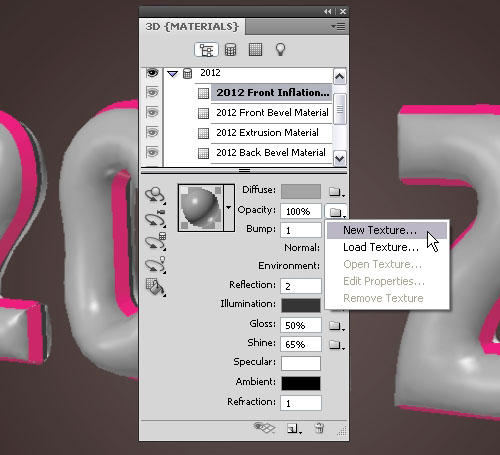
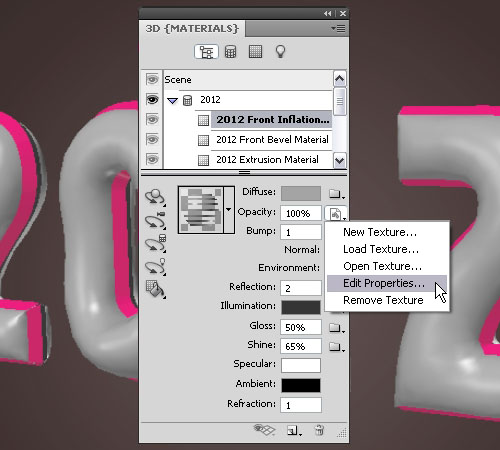
- Now, we are going to create the ribbon-like texture, using an Opacity Texture. So click the folder icon next to the
Opacity option, and choose
New Texture.
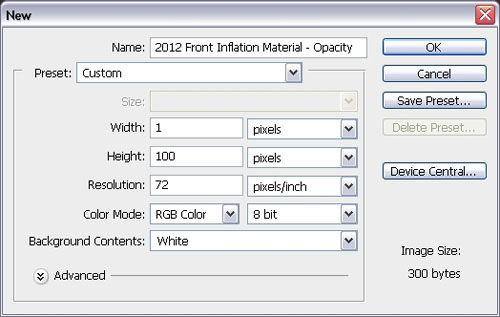
- Create a new 1 x 100 px document with a White background.
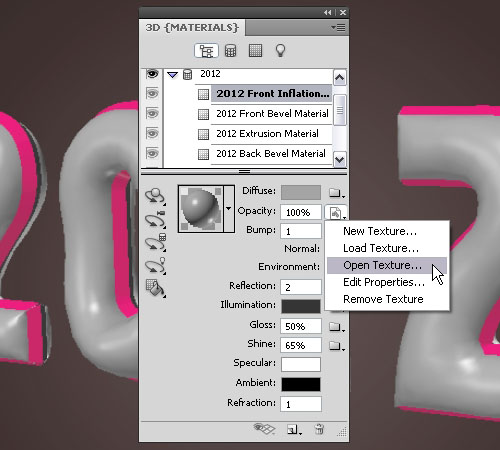
- The folder icon will become a Texture Map icon, click it and choose
Open Texture.
- Create a 50 px (Height) selection in the middle of the document and fill it with
Black. This will leave a 25 px (Height)
White areas in the top and the bottom of the document.
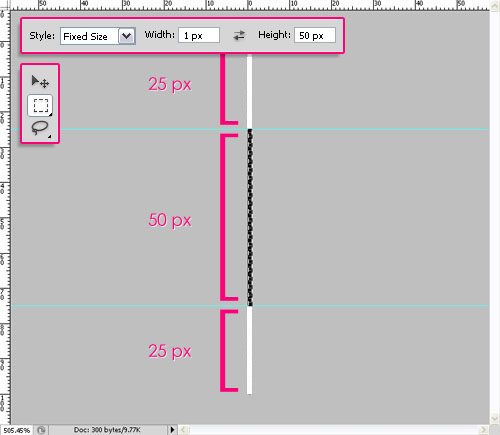
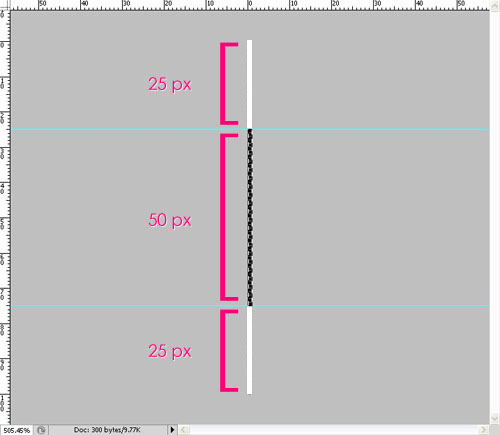 Tip: You can use a Fixed Size Rectangular Marquee Selection.
Save the changes, close the texture map file, and go back to the original document.
- Click the texture map icon and choose
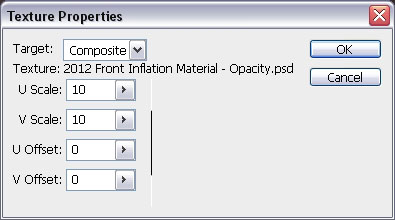
Edit Properties.
- Set both the
U Scale and
V Scale to
10.
- The trick here is that the
White areas will create
complete opacity and the
Black areas will create
complete transparency.
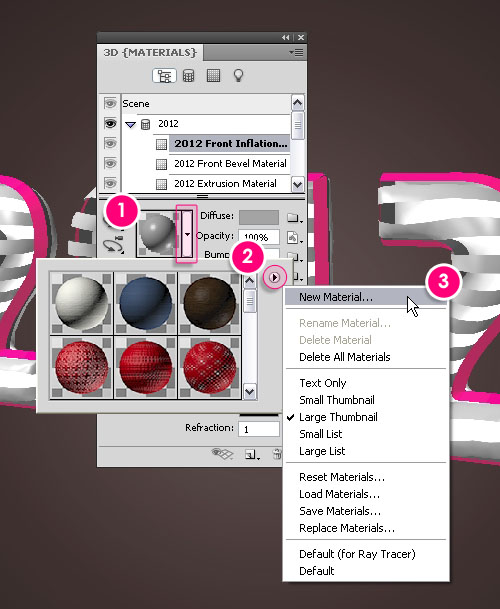
- Instead of repeating all these steps, you can save the material and
re-apply it with one click. To do so, expand the Material Presets box,
then, from the pop-up menu icon, choose
New Material.
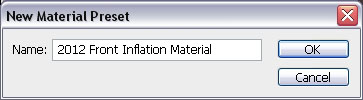
- Type in a name for the material and click OK.
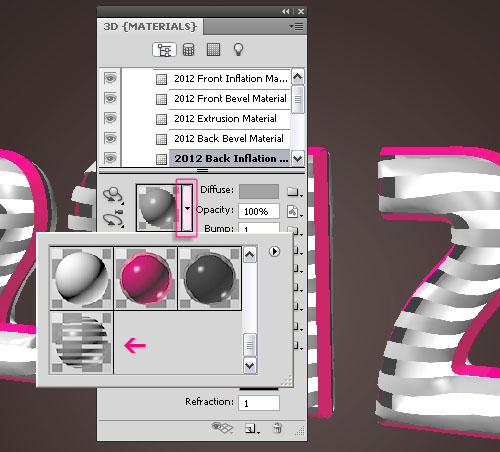
- Now, when you scroll down the Material Presets box, you’ll find the new material. Choose the
Back Inflation Material and click the material you just saved to apply it to the Back of the 3D text.
 Step 3:
- In the 3D Panel, click the
Create a new light icon at the bottom, then choose
New Point Light.
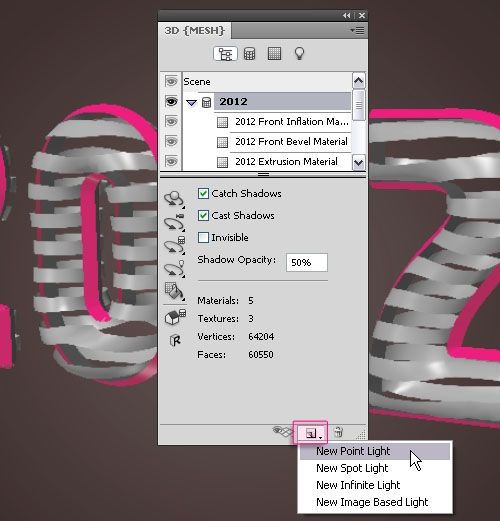
- This will enhance the overall lighting of the scene.

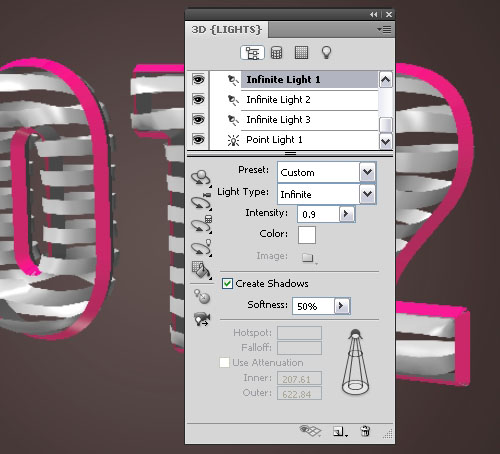
- Scroll down the Materials area to see the four lights you have and modify their settings.
-
Infinite Light 1: Set the Shadow
Softness to
50%.
(leaving the value at 0% will result in faster rendering, but
the shadow edges will be hard. So if you have no problem with hard edges
you can leave the softness at 0%.)
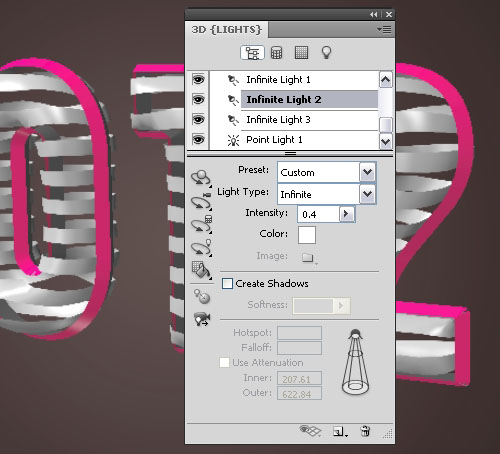
-
Infinite Light 2: Un-check the
Create Shadows box.
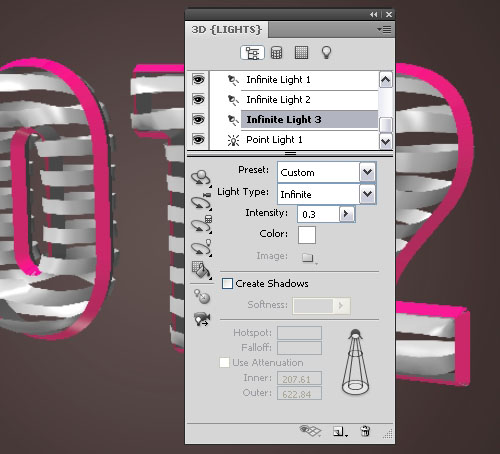
-
Infinite Light 3: Un-check the
Create Shadows box as well, we don’t want all four lights to create so many different shadows.
-
Point Light 1: The default settings are good.

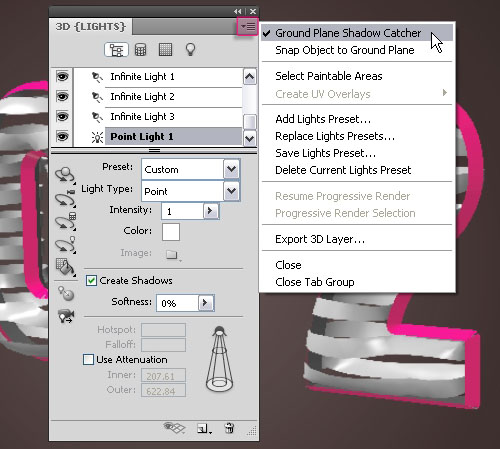
- In order for the shadows to be rendered on the ground without the
need to create a surface or a plane, click the pop-up menu arrow in the
top right corner of the 3D Panel, then click the
Ground Plane Shadow Catcher option.
- Once you’re done creating the scene, it’s time to render it. Click
Scene at the top of the 3D Panel, then choose
Ray Traced final from the
Quality drop down menu.
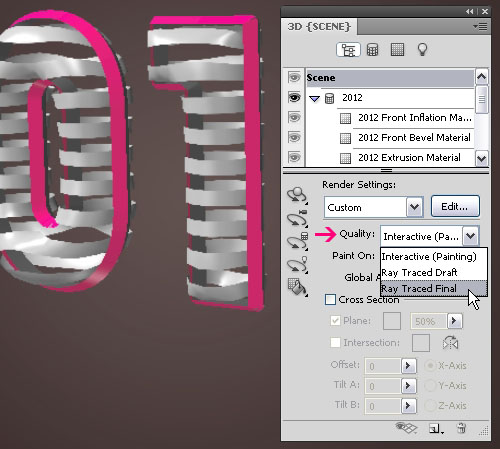
- The rendering process might take a couple of hours, but you can
click anywhere inside the document to stop rendering whenever you want.
 Step 4:
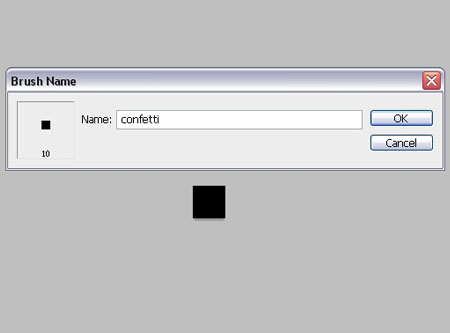
- To create the confetti brush, create a new 10 x 10 px document, and fill it with Black. Then go to
Edit -> Define Brush Preset, and type in a name for the brush. Close this document and go back to the original one.
- Open the
Brush panel (Window -> Brush), choose the square brush you’ve just created, and modify its settings as shown below:
-
Brush tip Shape:
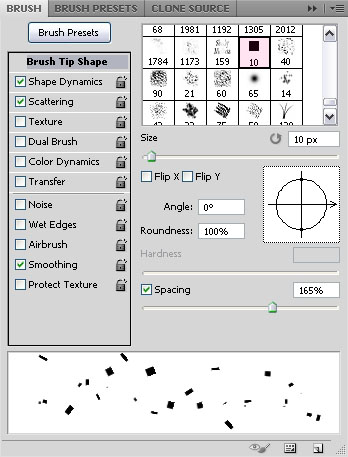
-
Shape Dynamics:
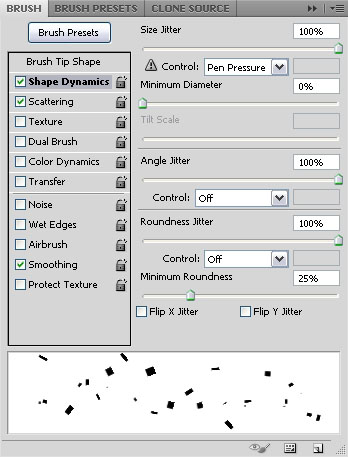
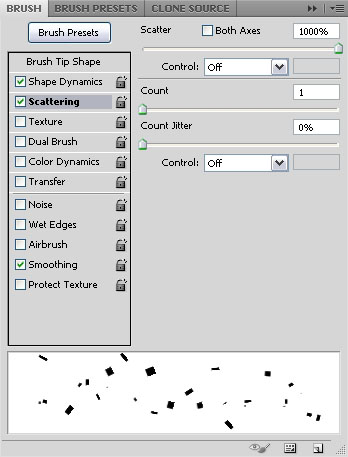
-
Scattering:
- Create a new layer on top of all layers and call it “Confetti”.
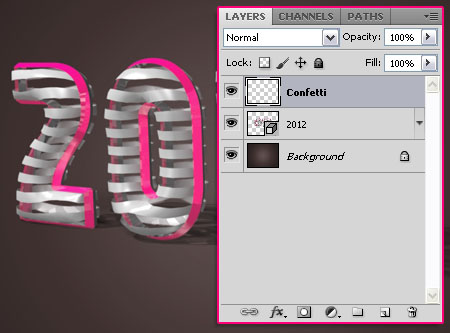
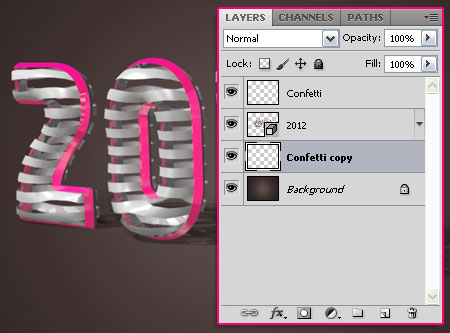
- Duplicate the “Confetti” layer, and drag the copy right below the 3D text layer.
- Select the original “Confetti” layer, and use the brush to scatter some confetti in the
upper
part around the text. Do not add any near the ground, as we are going
to apply different shadow settings for the confetti on the ground.

- Click the “Confetti copy” layer and fill the lower area with confetti.
 Step 5:
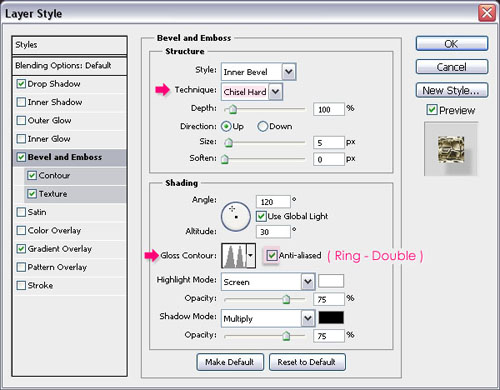
Double click the “Confetti” layer to apply the following Layer Styles:
-
Drop Shadow: Change the
Opacity to
15% and the
Distance to
30.

-
Bevel and Emboss: Change the
Technique to
Chisel Hard, the
Gloss Contour to
Ring – Double, and check the
Anti-aliased box.
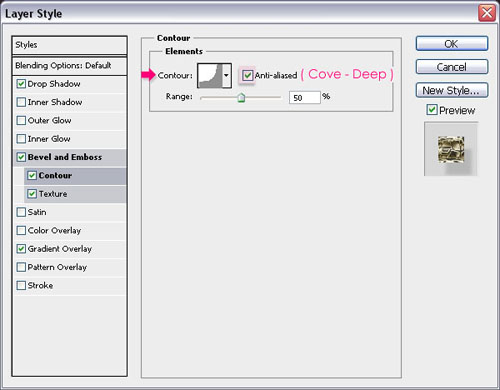
-
Contour: Choose the
Cove – Deep Contour.
-
Texture: Choose the
Metallic Snakeskin Pattern.

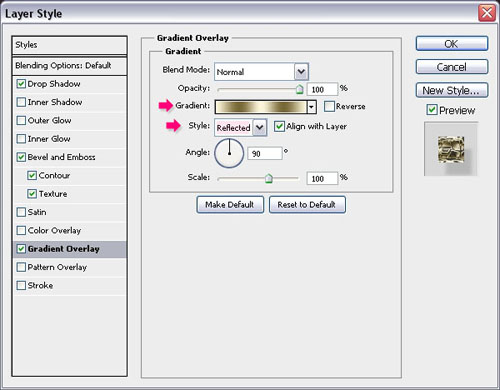
-
Gradient Overlay: Set the
Style to
Reflected, and click the
Gradient box to create the gradient.
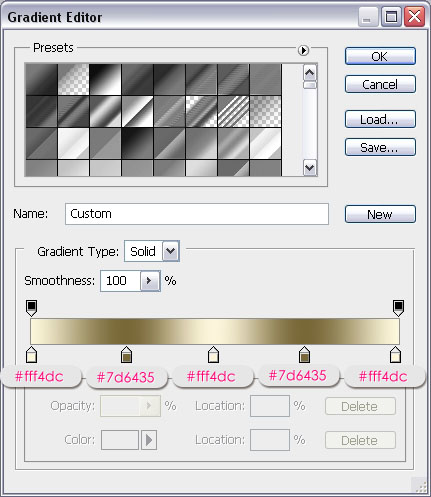
- The Gradient uses two colors:
#fff4dc and
#7d6435. But you can create other gradients using whatever colors you want.
- This is what you should get.

- Notice that the shadow of the confetti floating in the air is far
from the text and the ground, but that can’t be the case for the
confetti touching the ground. So copy and paste the Layer Style to the
“Confetti copy” layer
(Right click on the “Confetti” layer,
choose Copy Layer Style, then right click on the “Confetti copy” layer,
and choose Paste Layer Style.).
Then, double click the “Confetti copy” layer to modify the
Drop Shadow, by setting the
Opacity to
50%, and the
Distance to
5.
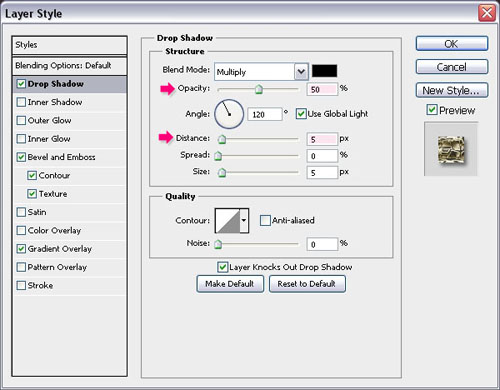
- This will add a darker and closer shadow for the confetti on the ground.

And that’s it! Hope you enjoyed the tutorial.


